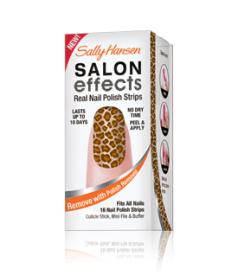
The idea behind these are that they are basically stickers you apply to your nail. They are made of real nail polish, but they have no drying time and are supposed to last upwards of ten days. Plus they have many cool designs ranging from bright colors to lace and fishnet and houndstooth.
In each box you get sixteen strips of polish (which seems like a very bizarre number... but they want to make sure there's a size that works for every nail, without giving you enough for two applications.) The nail polish strips are sealed really well, and you are supposed to throw away the ones you don't use... I think this is because once they are opened they start drying out and will lose their flexibility. You also get a cuticle stick and a mini three sided nail file (one side for buffing, the other sides have a strong grit and fine grit nail file [grit meaning how rough it is].) The kit also contains instructions.
Application is pretty easy. Starting with clean, dry nails (no basecoat!) you push back your cuticles. Next you buff the nails. After that you can start applying the strips. Starting at the cuticle you adhere the strip to the nail, smoothing as you go up. The cuticle stick can be used to help. The strip also has a bit of stretch to it, so you can manipulate it. The instructions tell you to file off any excess strip that overhangs the nail, but I just bent it over my natural nail and this tears it away nicely. Then I used the cuticle stick to help get rid of any strips that were extra on the sides- I did this by pushing the cuticle stick up and down all the way around my nail (like cutting a cake), so it smoothed out the strip on my nail while simultaneously severing the excess.

Once they're all applied, I used a topcoat to seal it. The directions don't call for one, but to me they felt like stickers and were matte looking, so putting a topcoat on made them look like real nail polish. Plus in my opinion, it made them seem more durable. BE AWARE- when you use a topcoat, you still have to be careful to let them dry. I happened to bump one of my nails that were still wet and it messed up the design a bit. But other than that, they wear on these are fantastic. I had mine on for a solid eight days, and I then decided to take them off because they were chipping- not at the tip, but at the base where my nails were growing out. To remove, simply use nail polish remover. They are harder to get off than regular polish, but they aren't as difficult as glitter polish.
Final grade: A!
No comments:
Post a Comment