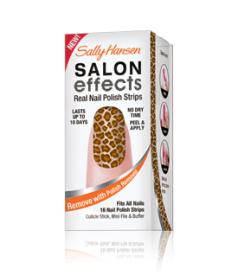
I love painting my nails, but I have very limited patience. So the whole base coat, two coats of color, topcoat, and drying time gets on my nerves. Plus, no matter how long I let them dry, I always feel like I end up chipping or smudging one of my nails right away. So I decided I'd give these new Sally Hansen nail strips a try.
The idea behind these are that they are basically stickers you apply to your nail. They are made of real nail polish, but they have no drying time and are supposed to last upwards of ten days. Plus they have many cool designs ranging from bright colors to lace and fishnet and houndstooth.
In each box you get sixteen strips of polish (which seems like a very bizarre number... but they want to make sure there's a size that works for every nail, without giving you enough for two applications.) The nail polish strips are sealed really well, and you are supposed to throw away the ones you don't use... I think this is because once they are opened they start drying out and will lose their flexibility. You also get a cuticle stick and a mini three sided nail file (one side for buffing, the other sides have a strong grit and fine grit nail file [grit meaning how rough it is].) The kit also contains instructions.
Application is pretty easy. Starting with clean, dry nails (no basecoat!) you push back your cuticles. Next you buff the nails. After that you can start applying the strips. Starting at the cuticle you adhere the strip to the nail, smoothing as you go up. The cuticle stick can be used to help. The strip also has a bit of stretch to it, so you can manipulate it. The instructions tell you to file off any excess strip that overhangs the nail, but I just bent it over my natural nail and this tears it away nicely. Then I used the cuticle stick to help get rid of any strips that were extra on the sides- I did this by pushing the cuticle stick up and down all the way around my nail (like cutting a cake), so it smoothed out the strip on my nail while simultaneously severing the excess.
Once they're all applied, I used a topcoat to seal it. The directions don't call for one, but to me they felt like stickers and were matte looking, so putting a topcoat on made them look like real nail polish. Plus in my opinion, it made them seem more durable. BE AWARE- when you use a topcoat, you still have to be careful to let them dry. I happened to bump one of my nails that were still wet and it messed up the design a bit. But other than that, they wear on these are fantastic. I had mine on for a solid eight days, and I then decided to take them off because they were chipping- not at the tip, but at the base where my nails were growing out. To remove, simply use nail polish remover. They are harder to get off than regular polish, but they aren't as difficult as glitter polish.
Final grade: A!
Tuesday, March 8, 2011
Thursday, March 3, 2011
Review: Too Faced Romantic Eye Palette
For those who may not be familiar with them, Too Faced offers a few really great eyeshadow palettes. The one I'm reviewing is their newest (and my personal favorite.) Prior to that their collection included the Smokey Eye, Natural Eye, and the Naked Eye.
What I love about these palettes is that they're all designed to be very user friendly, which makes them awesome for people who are new to make-up. Each palette contains 9 eyeshadows which are color coordinated into three different "looks"- namely the Day look, Classic look, and Fashion look. However, that doesn't mean people can't mix and match all the colors in the palette- some of my favorite looks have been made using colors from all three "looks." The layout for the three "looks" is a highlight shade (which is always the biggest), a lid color shade, and a crease/liner shade (which is always the darkest color).
All the palettes come with "How To" cards as well, which clearly lays out which colors they have used for each "look" and where on the eye they applied.
But once again, people shouldn't be afraid to branch out from these instructions- these cards are designed more for novices so they can get the basic feeling of where to apply and what colors work together.
Alright, now let's get into this particular palette.
I have obviously used it, so it looks a little grungy. The colors are as follows:
Day Look: Soulmates (a glittery light peach), I Do (a matte taupe), Un-veil (a matte dark chocolate)
Classic Look: Kiss the Bride (a matte baby pink), Cut the Cake (a glittery lavender grey), First Dance (a matte plum).
Fashion Look: Bouquet Toss (a matte off-white), Honeymoon (a metallic green-gold), Ever After (a glittery metallic brown).
I hate that the matte ones don't photograph well. But I'd have to say Cut the Cake is probably my favorite color- its really cool and different from other greys out there.
Too Faced eyeshadows are one of my favorite to work with. They have good pigmentation, blend well, and have interesting colors. I think the reason I've been loving this palette so much is because it has different formulations of the matte, glitters, and metallics that make it very versatile.
So all and all, this guy gets a A! Great for people new to make-up, and great for those with experience. Awesome colors, awesome to work with. Love it!
Subscribe to:
Posts (Atom)


